How to Disassemble and Reassemble the M1 Garand
Disassembly
Instructions
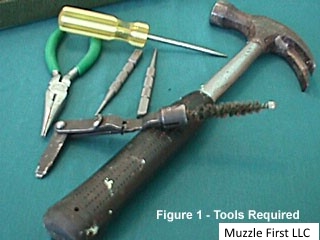
To properly disassemble an M1 Garand you need a slotted screw
driver, a needle nose pliers, a small punch, a medium punch, and
an M1 Garand Original Combination Maintenance Tool.
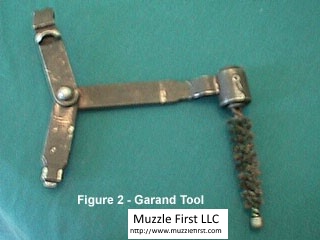
If you don't have an M1 Garand Original Combination Maintenance
Tool, you can find one at Midway USA .
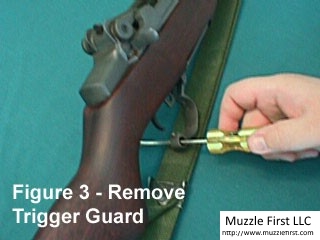
1) Use the slotted screwdriver to pull trigger housing guard to
rear and then downward.
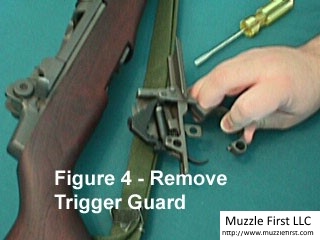
2) Remove the trigger assembly by grasping trigger guard and
pulling down and away from the rifle.
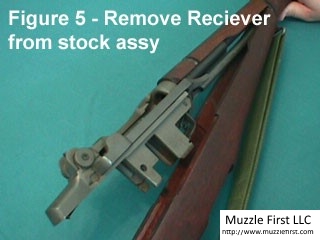
3) Remove receiver and barrel from stock by pulling up and away
from stock.
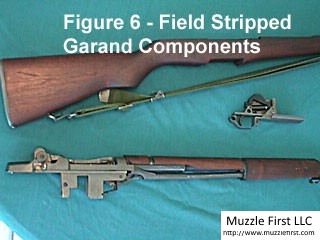
4) Displayed in Figure 6. is the M1 Garand field stripped into
it's three main parts: 1) receiver and barrel assembly, 2)
stock, and 3) the trigger assembly.
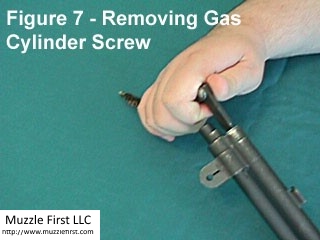
5) Using the slotted screwdriver attachment on the Garand Tool,
unscrew the gas cylinder screw at the end of the gas cylinder.
The use of the Garand Tool is recommended to do this task
because of the size of the slots in the end of the screw would
require a very large slotted screwdriver, which most people
don't have on hand. Also the handle can be turned to a right
angle to the screw driver, which gives considerably more torque
than a normal screwdriver.
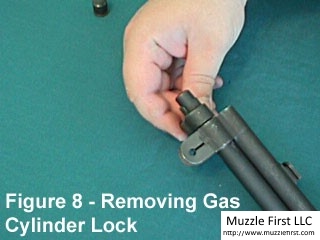
6) Finish unscrewing the gas cylinder lock using your hand.
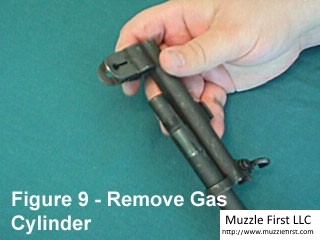
7) Carefully remove gas cylinder from rifle barrel and gas
piston.
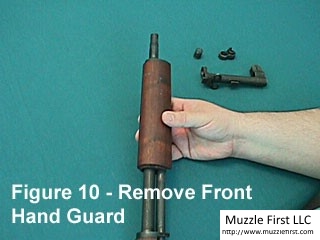
8) Slide front hand guard forward and remove from barrel.
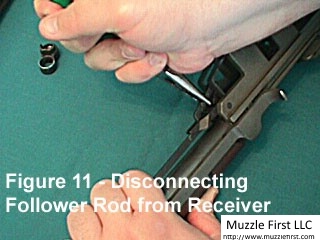
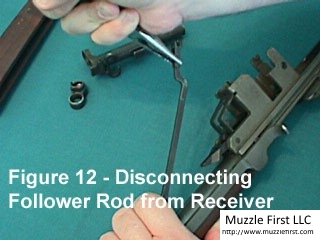
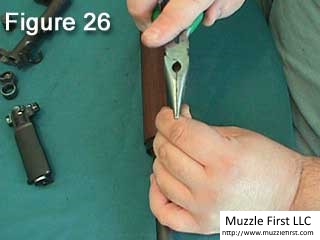
9) With receiver bottom facing up, use the needle nose pliers
and disconnect the follower rod from the follower arm in the
receiver.
10) Once the follower arm is disconnected from follower arm,
remove the follower rod and spring by pulling out of operating
rod.
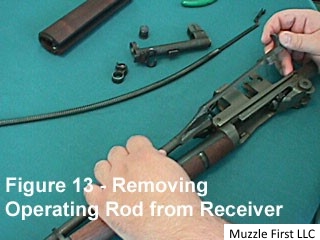
11) While holding the operating rod handle, pull back to rear of
receiver, then pull up and then forward.
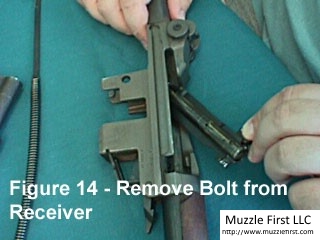
12) Pull bolt almost all the way to the rear of the receiver and
then you can pull up and out of the receiver.
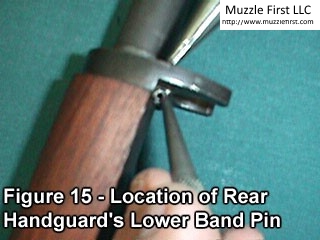
13) Figure 15 shows the position of the rear hand guard, lower
band retaining pin. The barrel should be pointing to the right
to remove pin.
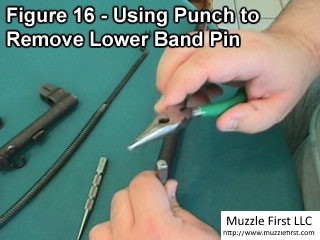
14) Use the medium punch to tap pin out of lower band, you may
have to use the small punch to finish guiding pin out of band.
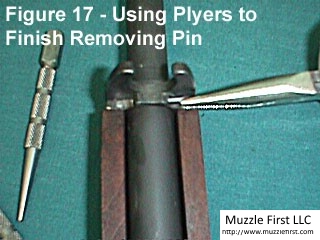
15) Using the needle nose pliers - finish removing retaining
Pin.
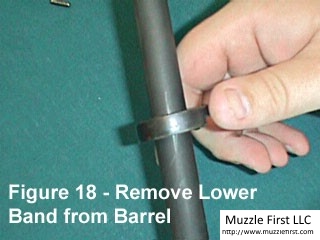
16) Slide lower band from barrel and set aside.
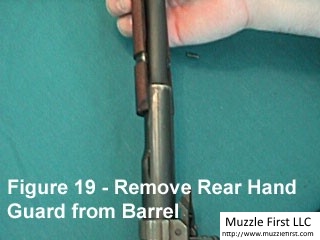
17) The rear Hand guard is now free to slide off of the barrel.
Pull hand guard forward to around 3 inches forward of original
positions and remove.
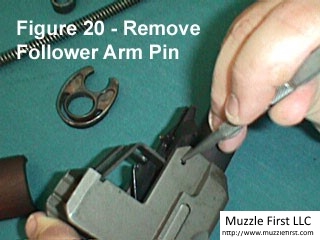
18) Lightly punch out follower arm pin from receiver.
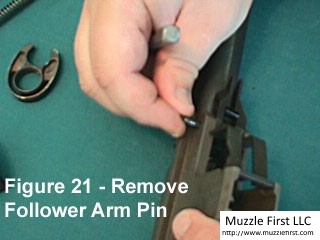
19) Finish removing follower arm pin by pulling from other side
of receiver.
20) Now the follower, follower arm, and bullet guide will easily
fall out of receiver.
REASSEMBLY INSTRUCTIONS
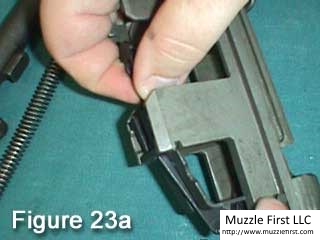
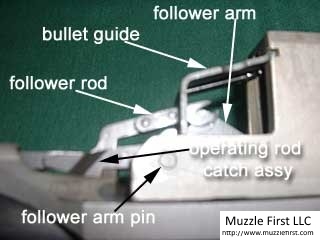
1) Now place the bullet guide in place as shown in Figure 23a .
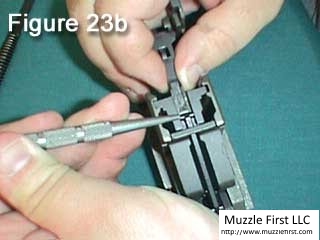
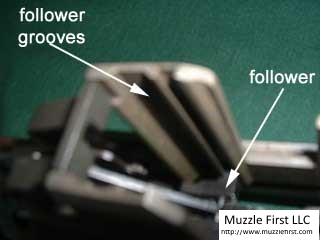
2) After bullet guide is in place, insert follower with
shoulders in grooves in receiver. Insert follower arm, tilt
until lugs pass through bullet guide. Insert operating rod catch
and then insert pin as shown in Figure 23b.
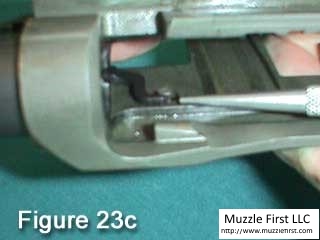
3) Look inside receiver and make sure the catch operating arm is
as shown in Figure 23c.
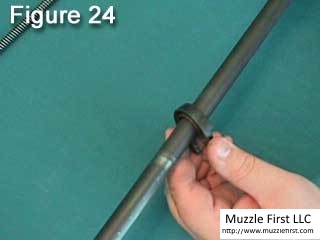
4) After sliding the rear hand guard over the barrel and to the
front of the receiver, slide the lower band over barrel and up
against rear hand guard.
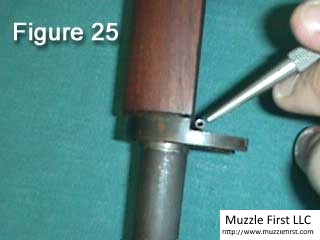
5) Insert pin into lower band and tap into hole as shown in
Figure 25.
6) You may have to use a punch to finish tapping the lower band
pin.
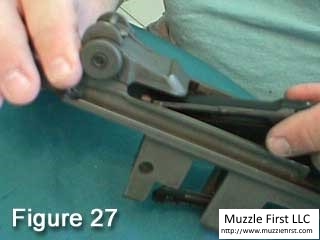
7) Turn receiver over and insert bolt into receiver as shown in
Figure 27.

8) Figure 28 shows the bolt properly installed into the
receiver.
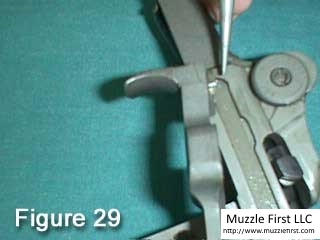
9) To attach operating rod, begin by taking lug of operating rod
and inserting it into the channel at rear of receiver as shown
in Figure 29.
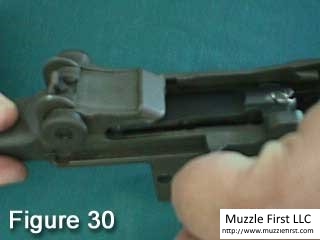
10) Then pull operating rod forward catching the bolt and
locking into place.
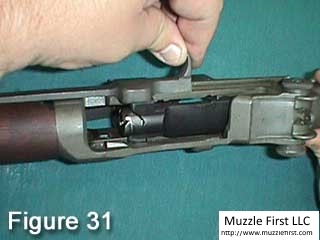
11) Test whether bolt and operating rod are properly installed
by lightly cycling back and forth to make sure there is no
binding or stoppage as shown in Figure 31.
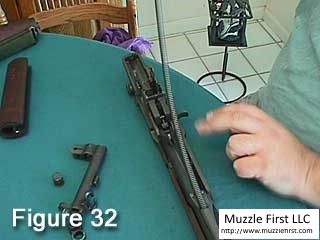
12) Reinstall operating rod spring by sliding the open spring
end into the operating rod as shown in Figure 32.
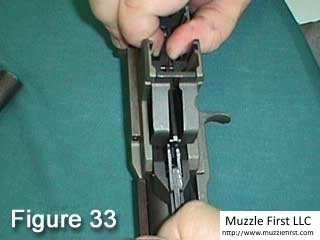
13) Once spring is in operating rod take other end and connect
to follower arm as shown in Figure 33.
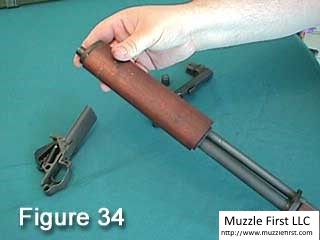
14) Slide the front hand guard over barrel and piston as shown
in Figure 34.
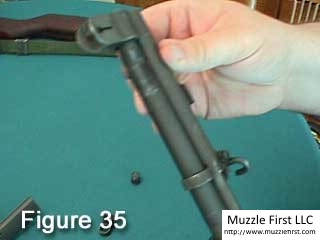
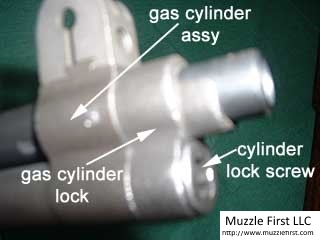
15) Slide gas cylinder over barrel and piston as shown inFigure
35.
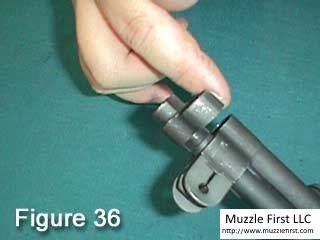
16) Hand thread gas cylinder lock over end threads on barrel end
as shown in Figure 36. Screw it onto barrel until it is flush
then back it off until it is aligned for insertion of gas lock
screw.
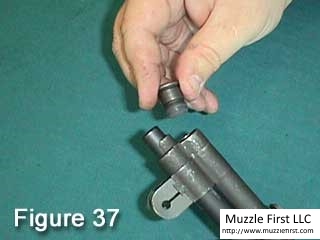
17) Hand thread into gas cylinder as shown in Figure 37.
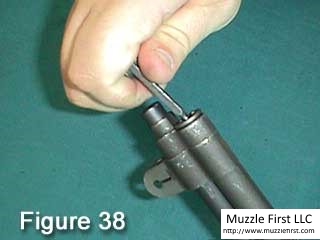
18) Take Garand Tool and tighten the gas cylinder screw until
fairly tight as shown in Figure 38.
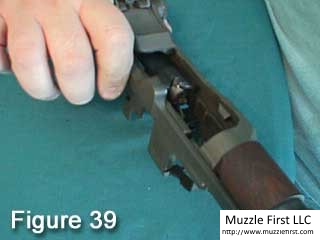
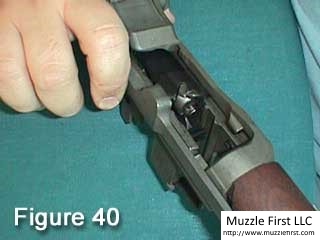
19) Cycle bolt as shown in Figures 39 and
40 and make sure it moves easily without any binding or
stoppage.
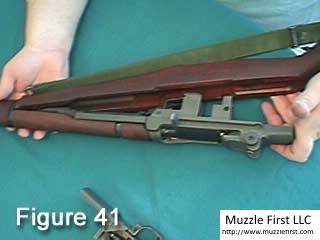
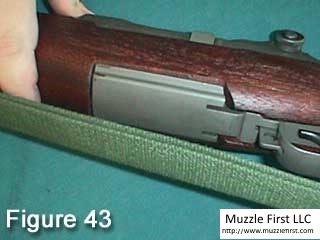
20) Insert receiver and barrel assembly into stock as shown in
Figure 41.
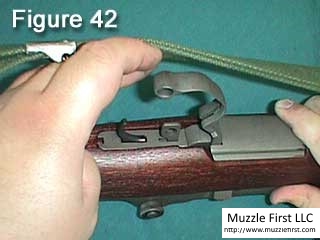
21) Turn rifle over and the trigger assembly into receiver by
carefully aligning lugs in the trigger assembly in the channels
in the receiver. Snap Trigger guard down and lock into place.
22) You have completed the disassembly and reassembly of the M1
Garand.
"The greatest battle implement ever devised" - General George S. Patton


